











Showing posts with label Baby Cakes Scraps. Show all posts
Showing posts with label Baby Cakes Scraps. Show all posts
Thursday, October 31, 2013


Tutorial using the Winter Chill scrap kit by Baby Cakes Scraps, and featuring the Kayla Fairy poser by Designs by Norella!
Supplies Needed
Paint Shop Pro - I am using X5, but any should do!
The Winter Chill scrap kit by Baby Cakes Scraps, which can be purchased at Bella Zingaro Studio HERE
The Kayla Fairy poser by Designs by Norella, which can be purchased at Digi Style Designs HERE
Mask #84 from Wee Scott Lass
Template #308 by Millie's PSP Madness
Any color or gradient and font of your choosing
Okay, let's begin. The first thing you will need to do, is to open the Template # 408 by Millie's PSP Madness. Next, let's create our mask. I have chosen a mask #84 from Wee Scott Lass. Okay, in Paint Shop Pro (PSP) click FILE>OPEN>and open the 1st mask you have chosen, then start a new image FILE>NEW>600x600 and transparent needs to be checked. Choose color or gradient on the right side layers menu; I chose a purple and teal dual toned gradient...flood fill the new blank image with the color or gradient..the flood fill is the paint bucket shape. Now go to the top layers menu and click NEW MASK LAYER> from image...a pop up opens..click on the title of the mask you chose in the drop down menu. Now go back to the side layers menu and click on the square that has the layers combined...right click it then click merge..the merge group..and voila..you have a mask layer now! :) Just copy and paste it to the tag, and increase the size by 10%...move it around until you are happy with the amount that shows.
***(NOTE: there is a layers menu on the right side of your screen..if u do not see it then look up top and click VIEW>PALETTES>LAYERS and it will open up...u use this layer to bring things to the front..say for example u put a shoe on the tag but it went behind a bucket and u want it in front of the bucket...while holding the left click button on your mouse or touch pad down, you would slide the shoe to the layer the bucket is on..it would now be in the front...use this anytime u want to bring something to the forefront.)***
Now, let's add some other items to start adding depth and dimension to our tag! The first thing we want to do, is place papers on parts of our template. The following is where your papers should be: cloudy paper plain on rasters 1 and 2, smudged paper on rasters 3 and 4, flake paper on rasters 5 and 6, and christmas tree paper on raster 7.
The next thing we want to do is to start adding our elements to make this tag come to life!! The very first thing we will want to do is to add our fairy poser. Find and open the #2 Kayla Fairy poser and reduce her size by 8% and place her on the bottom, centered...decrease the size of the word art and move it to the right of the poser. Next, find and open the El # 4 and leaving the size as is, place it on the bottom right...duplicate it and flip it horizontally and place on the bottom left. (You can keep duplicating these to make them appear darker if desired). Next, find and open the candle wreath and reduce it by 90% and place it in the bottom left corner, in the forefront.
Next, find and open the metal flower blue and reduce it by 80% and place it in the top left corner. Next, find and open the teal feather and reduce it by 95% and place it angled on the bottom left of the candle...duplicate it and flip it horizontally and place on the bottom right of the candle. Next, find and open the teal satin bow and reduce it by 90% and place it angled on the top right corner. Next, find and open the green brad and reduce it by 90% and place it in the center of the bow on the top right.
Next, find and open the doodle and reduce it by 10% and place it angled center top on the left right above the poser's head...duplicate it and place center right. Next, find and open the teal brad and reduce it by 95% and place one in the center of each of the doodles. Next, find and open the ribbon flower green and reduce it by 80% and place on top left side.
Next, find and open the el 2 doodle and leaving the size as is, place it above the poser's head...duplicate it and flip it horizontally. Next, find and open the metal flower green and reduce it by 90% and place it on the right side below the bow. Next, find and open the satin bow and reduce it by 85% and place it at the bottom of the candle, in the forefront...duplicate and flip it horizontally. Next, find and open the teal brad and reduce it by 97% and center it on the bow.
Lastly, add 3D drop shadows wherever you would like them to be. Make sure at this point that you add the copyright information (VERY IMPORTANT)!!
You did it! You now have finished this tag. Finally, add a name in any font and color of your choosing. I hope you enjoyed this tutorial. If you did, please follow my blog and pass it along to others. If you make a tag using this tutorial, please send it to meat robynebutts@gmail.com, so I can place it on my blog.
Hugs and blessings,
Robyne
Thursday, October 24, 2013

Preview of the gorgeous Cocoa Christmas scrap kit by Baby Cakes Scraps!

Tutorial using the Cocoa Christmas scrap kit by Baby Cakes Scraps, and featuring the Veronica tube by Alex_Prihodko!
Supplies Needed
Paint Shop Pro - I am using X5, but any should do!
The Cocoa Christmas scrap kit by Baby Cakes Scraps, which can be purchased at Bella Zingaro Studio HERE
The Veronica tube by Alex_Prihodko, which can be purchased at Pics for Design HERE
Mask #84 from Wee Scott Lass
Template #229 from Millie's PSP Madness
Any color or gradient and font of your choosing
Okay, let's begin. The first thing you will need to do, is to open the template #84 from Wee Scott Lass. Next, let's create our mask. I have chosen a mask # 84 from Wee Scott Lass. Okay, in Paint Shop Pro (PSP) click FILE>OPEN>and open the 1st mask you have chosen, then start a new image FILE>NEW>600x600 and transparent needs to be checked. Choose color or gradient on the right side layers menu; I chose a red gradient...flood fill the new blank image with the color or gradient..the flood fill is the paint bucket shape. Now go to the top layers menu and click NEW MASK LAYER> from image...a pop up opens..click on the title of the mask you chose in the drop down menu. Now go back to the side layers menu and click on the square that has the layers combined...right click it then click merge..the merge group..and voila..you have a mask layer now! :) Just copy and paste it to the tag, increasing the size by 20% and center it...make sure the mask is on the very back layer.
***(NOTE: there is a layers menu on the right side of your screen..if u do not see it then look up top and click VIEW>PALETTES>LAYERS and it will open up...u use this layer to bring things to the front..say for example u put a shoe on the tag but it went behind a bucket and u want it in front of the bucket...while holding the left click button on your mouse or touch pad down, you would slide the shoe to the layer the bucket is on..it would now be in the front...use this anytime u want to bring something to the forefront.)***
Now, let's add some other items to start adding depth and dimension to our tag! The first thing we want to do, is place papers on parts of our template. The following is where your papers should be. Paper #6 on raster 1, paper # 13 on raster 2, paper # 14 on raster 3, paper # 5 on raster 4, paper # 2 on raster 5, and paper # 9 on raster 6. The next thing we want to do is to add our tube images. Find and open the full view tube image (make her hair blonde and the dress red)...copy and paste it on the tag... reduce it by 50% and place her centered at the bottom right...flip her horizontally...make sure she is in the forefront. Now duplicate it, and cut or erase the bottom half of the tube from the breasts down...reduce it by 70%...place the top half in the brown oval on the left side. Use the effects menu and make it sepia; use the effects menu again and add lights (at 50%) under illumination.
Next, find the candle number 2 and reduce it by 85% and place it in the bottom left corner. Next, find and open the flourish #1 and reduce it by 25%; place it on the right side, making sure it is on the layer in front of raster #4...duplicate it and flip it horizontally, and place it on the left side. Next, find and open the rain and leave the size as is; place it centered at the top, in front of the side flourish layers. Next, find and open the champagne and reduce it by 70% and place it on the bottom left corner, on the right side of the candle; make sure it is in the forefront.
Next, find and open the bow #12 and reduce it by 95% and angle it on the right side at the top corner of raster #7. Next, find and open the butterfly #2 and reduce it by 85% and place it on the left side, on top of the raster 7 layer. Next, find and open the kiss me #1 and reduce it by 95% and place on the bottom left, in front of the candle layer..at the bottom. Next, find and open the rose #6 and reduce it by 80% and flip it horizontally; place it to the right of the champagne, making sure it is in front of the champagne, but behind the tube's legs.
Next, find and open the flourish # 3 and reduce it by 60% and place at the top left; duplicate it and flip it horizontally and place on the top right...make sure they come together in the center. Next, find and open the bow #5 and reduce it by 90% and place it at the top left at an angle, on top of raster 5. Next, find and open the rose #3 and reduce it by 98% and place it in the top left in the center of bow #5...duplicate it and flip it horizontally..this makes a fuller flower. next, find and open the flower #3 and reduce it by 95% and place it in the center of bow # 12. Next, find and open the strawberry and reduce it by 98% and place in the bottom left at the bottom of the candle; make sure it is in the forefront. Decrease the size of the word art that came with the template by 50%, and place it on the left side, at the bottom of the oval.
Lastly, add 3D drop shadows wherever you would like them to be. Make sure at this point that you add the copyright information (VERY IMPORTANT)!!
You did it! You now have finished this tag. Finally, add a name in any font and color of your choosing. I hope you enjoyed this tutorial. If you did, please follow my blog and pass it along to others. If you make a tag using this tutorial, please send it to meat robynebutts@gmail.com, so I can place it on my blog.
Hugs and blessings,
Robyne
Friday, August 9, 2013

Tutorial using the Twilight Fantasy scrap kit by Babycakes Scraps, and featuring the Black Angel tube by Alex_Prihodko
Supplies Needed
Paint Shop Pro - I am using X5, but any should do
The Twilight Fantasy scrap kit by Baby Cakes Scraps, which can be purchased at Bella Zingaro HERE
The Black Angel tube by Alex_Prihodko, which is available for purchase at Pics for Design HERE
Any color or gradient and font of your choosing
Okay, let's begin. The first thing you will need to do, is to start a new image in Paint Shop Pro (PSP for short). To do this, look at the top left corner, and click on FILE>NEW> a pop up will open...set width and height to 600, make background transparent, and make sure the transparent box is checked. Click okay, and you now have a blank size base for your tag, already sized and ready to go.
***(NOTE: there is a layers menu on the right side of your screen..if u do not see it then look up top and click VIEW>PALETTES>LAYERS and it will open up...u use this layer to bring things to the front..say for example u put a shoe on the tag but it went behind a bucket and u want it in front of the bucket...while holding the left click button on your mouse or touch pad down, you would slide the shoe to the layer the bucket is on..it would now be in the front...use this anytime u want to bring something to the forefront.)***
We will not be using a background paper for this tag, as I wanted parts to be transparent for a cooler effect. First things first, find and open the Black Angel tube. Hide all layers except the violet boots and the wings...merge those visible layers...now copy and paste her to the tag. Reduce her size by about 65% and place her centered, but to the right side. Now find and open the EL #36 doodle with the stone and reduce the size by 35% and place it centered at the bottom of the tag. Now find and open the El#35, and place it on the left side. use the side layers menu and slide the tube to the forefront.
Now find and open the El #53 corner flowers and reduce it by 80% and place in the top left corner...duplicate and flip it horizontally and place in the top right corner. Now find and open theEl #25 button and reduce it by 90% and place one centered in each of the top corner flowers swags. now find and open the El #30 cloud and reduce it by 25% and place it above the tube, centered, and use the layers menu and slide the swirls back to the forefront. Now find and open the El #7 and reduce it by 75% and place on the top right...duplicate and flip it horizontally and place on the top left . Use the side layers menu and slide them all the way to the bottom.
Now find and open El# 15 the flower trim and reduce it by 90%. Keep duplicating and moving it until you have gone all the way across the bottom of the tag. Duplicate and flip it vertically and keep moving across the entire top of the tag...slide the corner flowers and buttons to the forefront. Next, find and open El#43 the beige tag and reduce it by 70% and place it on the left side, under her wing. Now find and open the El# 31 the genie bottle and reduce it by 70% and place it on the right bottom of the tag.
Next, find and open the El #10 dream rock and reduce it by 80%, and center it between the head and the right wing. Next, find and open the El #51 and reduce it by 85% and place the mirror on the top right of the beige tag. Next, find and open El 326 the button and reduce it by 90% and place it on the bottom left of the tag. Now find and open El #25 button and reduce it 95% and place it over the stone in the bottom metal swirl. Lastly, find and open El #13 and reduce it by 75% and place on the top left, then duplicate it and flip it horizontally and place on the top right, and slide it down on the layers menu.
You did it! You now have finished this tag. You will need to add copy wright info to your tag, as it is the law. Finally, add a name in any font and color of your choosing.
I hope you enjoyed this tutorial. If you did, please follow my blog and pass it along to others. If you make a tag using this tutorial, please send it to meat robynebutts@gmail.com, so I can place it on my blog.
Hugs and blessings,
Robyne
Matching timeline cover I created using the Twilight Fantasy scrap kit by Baby Cakes Scraps, and the Black Angel tube by Alex_Prihodko

Preview of the awesome Twilight Fantasy scrap kit by Babycakes Scraps!

Preview of the freebie cluster frame that I created using the Twilight Fantasy scrap kit by Babycakes Scraps.

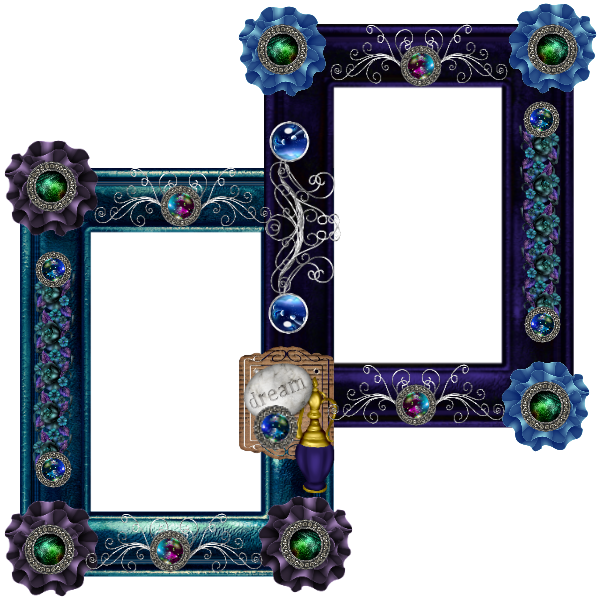
FREEBIE cluster frame! You can download this frame by simply right-clicking on the image below, and saving it to your computer. (It is in PNG format). Please do not claim as your own work; either link back here to my blog, or to the shop link where this kit can be purchased...thank you!
Saturday, July 13, 2013

Tutorial using the Marissa scrap kit by Baby Cakes Scraps, and featuring the Katty tube by Alex_Prihodko
Supplies Needed
Paint Shop Pro - I am using X5, but any should do
The Marissa scrap kit by Baby Cakes Scraps, which can be purchased at Bella Zingaro HERE
The Katty tube by Alex_Prihodko, which is available for purchase at Pics for Design HERE
Any color or gradient and font of your choosing
Okay, let's begin. The first thing you will need to do, is to start a new image in Paint Shop Pro (PSP for short). To do this, look at the top left corner, and click on FILE>NEW> a pop up will open...set width and height to 600, make background transparent, and make sure the transparent box is checked. Click okay, and you now have a blank size base for your tag, already sized and ready to go.
***(NOTE: there is a layers menu on the right side of your screen..if u do not see it then look up top and click VIEW>PALETTES>LAYERS and it will open up...u use this layer to bring things to the front..say for example u put a shoe on the tag but it went behind a bucket and u want it in front of the bucket...while holding the left click button on your mouse or touch pad down, you would slide the shoe to the layer the bucket is on..it would now be in the front...use this anytime u want to bring something to the forefront.)***
We will not be using a background paper for this tag. Now, find and open the Katty tube and hide all layers except the full-view and the yellow jacket...merge the visible layers. Now copy it and paste it to the image. reduce it by 40% and center her on the tag. Now find and open the swirl and reduce it by 70% and place it at the top right...duplicate it and flip it horizontally and place at the top left. now find the swirly and open it. Increase it by 15% and center it behind the tube.
Next, find and open the black butterfly and leave the size as it is. Place it on the left side on the yellow swirl...duplicate, flip it horizontally and place on the right side yellow swirl. Repeat process with the other yellow swirl...on both sides, making it go opposite the direction on each side that you did it the first time. Now find and open the charm and reduce it by 80%. Place it on the bottom right of the tube..duplicate it and flip it horizontally and place it on the bottom left of the tube. Now find and open the blossom and reduce it by 90%, and place on the bottom left corner of the charm on the left side of the tag, and on the bottom right side of the charm on the right side of the tag. Now find and open the black flower and reduce it by 95% and place one centered on each of the blossoms.
Now find and open the black bow and reduce it by 80%. place it angled on the right side by her elbow. Duplicate and flip it horizontally and place it on the other side. Now find and open the gem and reduce it by 98% and place one in the center of each of the black bows.Now find and open the glitter leaf, and reduce it by 90%. Place it on the right side, duplicate and flip it horizontally and place it on the left side....by the yellow blossoms.
Next, find and open the metal floral brad and reduce it by 90% and place one underneath each of the bows. Now find and open the flower #3 and reduce it by 98% by the glitter leafs on eachside. Next, find and open the yellow rose and reduce it by 90% and place one on the bottom right-hand corner....duplicate it and flip it horizontally and place it in the bottom left-hand corner. Lastly open the black bowtie #2 and reduce it by 90%. Place it on the bottom right under the blossom and slide it to the forefront...then duplicate it and flip it horizontally. Repeat this process on the bottom left side.
You did it! You now have finished this tag. You will need to add copy wright info to your tag, as it is the law. Finally, add a name in any font and color of your choosing.
I hope you enjoyed this tutorial. If you did, please follow my blog and pass it along to others. If you make a tag using this tutorial, please send it to meat robynebutts@gmail.com, so I can place it on my blog.
Hugs and blessings,
Robyne
Matching timeline cover I created using the Marissa scrap kit by Baby Cakes Scraps, and the Katty tube by Alex_Prihodko

Preview of the Marissa scrap kit by Baby Cake Scraps

Preview of the FREEBIE cluster frame I created using the Marissa scrap kit by Baby Cake Scraps

FREEBIE CLUSTER FRAME! You can download this frame by simply right-clicking on the image below, and then saving it to your computer. (It is in PNG format). Please do NOT claim this as your own work; either link back here to my blog, or to the shop link where this kit can be purchased...thank you!

Monday, July 8, 2013

Tutorial using the Sign of the Gypsy Queen by BabyCake Scraps, featuring the Purple Shadow tube by Arthur Crowe.
Supplies Needed
Paint Shop Pro - I am using X5, but any should do
The Sign of the Gypsy Queen scrap kit, which can be purchased at Bella Zingaro HERE
The Purple Shadow tube by Arthur Crowe, which is available for purchase at Arthur Crowe's Factory HERE
Any color or gradient and font of your choosing
Okay, let's begin. The first thing you will need to do, is to start a new image in Paint Shop Pro (PSP for short). To do this, look at the top left corner, and click on FILE>NEW> a pop up will open...set width and height to 600, make background transparent, and make sure the transparent box is checked. Click okay, and you now have a blank size base for your tag, already sized and ready to go.
***(NOTE: there is a layers menu on the right side of your screen..if u do not see it then look up top and click VIEW>PALETTES>LAYERS and it will open up...u use this layer to bring things to the front..say for example u put a shoe on the tag but it went behind a bucket and u want it in front of the bucket...while holding the left click button on your mouse or touch pad down, you would slide the shoe to the layer the bucket is on..it would now be in the front...use this anytime u want to bring something to the forefront.)***
We will not be using a background paper for this tag. Now, find and open the Purple Shadow tube and hide all the tattoos signature, and background. Now reduce her size by about 45% and center her on the tag. Next, find and open the swag. Leave the size as it is, and center it on the tag, behind the tube. Next, find and open the rain. Leave the size as is and center it on the tag. Use the side layers menu and slide the swag back to the forefront.
Next, find and open the purple lace. Reduce the size by 89% and place it in the top left corner. Now...keep duplicating and moving over, until you have reached the other side. Now duplicate that end and flip it vertically...now duplicate and keep moving across the bottom, like you did on the top. Next, find and open the fiber beads and reduce it by 85%...add it to the top left on the center of the purple lace...repeat the process u used with the lace.
Next, find and open the splat, and reduce it by 70%..keep duplicating it and moving it around, until you are happy with the coverage and placement. Next, find and open the glitter trails. Reduce the size by 70% and place on the left side of the tube, hanging over the swag. Duplicate it and flip it horizontally, and place it on the right side. Next, find and open the gem curl. reduce the size by 80% and place it on the bottom left side of the swag...duplicate it and flip it horizontally and place it on the bottom right swag.
Next, find and open the silky bow #2 and reduce it by 80%. Place on in each of the four corners. next, find and open the brooch and reduce it by 90%, and place one in the center of each of the corner bows. Now find and open the angel wings. Leave the size as is, and center behind the tube. Lastly, open the sparkle trail #2 and reduce it by 40%. Keep duplicating and moving it around until you are happy with the placement.
You did it! You now have finished this tag. You will need to add copy wright info to your tag, as it is the law. Finally, add a name in any font and color of your choosing.
I hope you enjoyed this tutorial. If you did, please follow my blog and pass it along to others. If you make a tag using this tutorial, please send it to meat robynebutts@gmail.com, so I can place it on my blog.
Hugs and blessings,
Robyne
Matching timeline cover I created using the Sign of the Gypsy Queen scrap kit by BabyCake Scraps, and featuring the Purple Shadow tube by Arthur Crowe

The Sign of the Gypsy Queen scrap kit by BabyCake Scraps, which you can purchase at Bella Zingaro HERE

Preview of the freebie cluster frame!

FREEBIE cluster frame created using the Sign of the Gypsy Queen scrap kit by BabyCake Scraps. You can download this frame by simply right-clicking on the image below, and saving it to your computer. (It is in PNG format for you). Please do NOT claim this as your own work; either link back here to my blog, or to the shop where the kit can be purchased...thank you!

Monday, April 8, 2013

NEW CT Tag, tutorial, and FREEBIE cluster frame that I made from the kit called Tickle Me Pink, by Baby Cakes Scraps. This kit is super sweet, and sure to please any pink fanatic like myself! The kit can be purchased at the Bella Zingaro Studio HERE
You can check out the tutorial I made for this tag by clicking the "My Tuts" tab at the top of this page, or by simply clicking HERE
You can get to the FREEBIE cluster frame I made using this kit, so u can snag it by clicking the "My Freebies and snags" tab at the top of this page, or by simply clicking HERE
Subscribe to:
Posts
(Atom)
Licensed Reseller

Beautiful Blog Award

Designer That Inspires Award

Blog I Love Award

Rawk My Socks Award

CU License Tagging Obsessions

Niqui Designs CU License

CU License Scraps Dimensions

DzinesByMelz CU License

Anorie's CU License

CU License Lacarolita's Designz

CU License Tezza'a Dezignz

CU License Scrap and Tubes

Cakie Pot Pie CU License

Denise Creationz CU License

EW CU License

FDM CU License

More shops I CT for & Love



 "
"