


Monday, July 29, 2013

Tutorial using the Cherished Moments scrap kit by Dran Designs, and featuring the Summer Fun cookie poser by Erica Wilma
Supplies Needed
Paint Shop Pro - I am using X5, but any should do
The Cherished Moments scrap kit by Dran Designs, which can be purchased at Sweet-Pinups HERE
The Summer Fun cookie poser by Erica Wilma, which can be purchased at Sweet-Pinups HERE
Any color or gradient and font of your choosing
Okay, let's begin. The first thing you will need to do, is to start a new image in Paint Shop Pro (PSP for short). To do this, look at the top left corner, and click on FILE>NEW> a pop up will open...set width and height to 600, make background transparent, and make sure the transparent box is checked. Click okay, and you now have a blank size base for your tag, already sized and ready to go.
***(NOTE: there is a layers menu on the right side of your screen..if u do not see it then look up top and click VIEW>PALETTES>LAYERS and it will open up...u use this layer to bring things to the front..say for example u put a shoe on the tag but it went behind a bucket and u want it in front of the bucket...while holding the left click button on your mouse or touch pad down, you would slide the shoe to the layer the bucket is on..it would now be in the front...use this anytime u want to bring something to the forefront.)***
We will not be using a paper or a mask for this tag. First thing, let's add the base of the tag, El #38. leave the size as is, and center it on the tag. Next, find and open the cookie poser #3. Reduce her by 65% and place it centered on the flower. Now find and open the El #80 and reduce it by 90% and place it on the poser's head. Next, find and open the El #16 bow and reduce it by 80%, and place one in both top corners. next, find and open El# 45 flower and reduce it by 90% and center on the top corner bows. Now find and open the El #52 silver star rhinestone and reduce it by 95% and center on flowers on the bows...make sure the sides are going in opposite directions.
Now find and open the El #90 the cat and reduce it by 75% and place it at the bottom right of the poser. next, find and open the El #67 and reduce it by 70% and place it on the left side...duplicate it and flip it horizontally and place it on the right side. Now find and open El #71 bobby pin with the key and reduce it by 90%. Place on the right side of the center flower, on the bottom beige part...duplicate and flip it horizontally and place on the left side. Now find and open the El #74 the bobby pin with the rose on it, and reduce the size by 90%. Place it angled above the other bobby pin on the right side, then duplicate it and flip it horizontally and place it on the left side angled. Now find and open the El #55 the pink heart stone key and reduce it by 95%. Place it on the top cream area of the flower, on the left side. Duplicate it and flip it horizontally and place on the right, also angled.
Now find and open the El# 81 greenery and reduce it by. Place it on the bottom left side of the poser...duplicate and flip it horizontally and place on the right side of the bottom of the poser. Use the side layers menu and slide the poser to the forefront. Now find and open El #10 the pink beads, and reduce them by 75%. Place in the top left corner, then duplicate and flip it horizontally and place in top right corner. Now duplicate it and flip it vertically and place it in the bottom right corner. Duplicate it one more time and flip it horizontally and place it on the bottom left corner. Next, find and open the El #29 and reduce it by 70% and place it all the way across the bottom of the tag.
Now find and open the El #85 grass and reduce it by 80%. Place it on the bottom right under the chains, duplicate it, then duplicate it again and flip it horizontally, and duplicate one more time. repeat this process on the left side. next, find and open the El#88 and reduce it by 80%, and place it on top of the grass on the bottom right...duplicate it and flip it horizontally...repeat on left side. Now find and open El # 51 and reduce it by 80% and angled it on the bottom left. Open El #25 cupcake and reduce it by 85% and place it to the right of the stone on the bottom left. Find and open El #50 stone and reduce it by 80% and place angled on far bottom right. Lastly, find and open the El # 60 and reduce it by 90% and place it above the stone on the bottom right.
You did it! You now have finished this tag. You will need to add copy wright info to your tag, as it is the law. Finally, add a name in any font and color of your choosing.
I hope you enjoyed this tutorial. If you did, please follow my blog and pass it along to others. If you make a tag using this tutorial, please send it to meat robynebutts@gmail.com, so I can place it on my blog.
Hugs and blessings,
Robyne
Matching timeline cover I created using the Cherished Moments scrap kit by Dran Designs, and the Summer Fun cookie poser by Erica Wilma

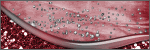
Preview of the gorgeous Cherished Moments kit by Dran Designs!

Subscribe to:
Post Comments
(Atom)
Licensed Reseller

Beautiful Blog Award

Designer That Inspires Award

Blog I Love Award

Rawk My Socks Award

CU License Tagging Obsessions

Niqui Designs CU License

CU License Scraps Dimensions

DzinesByMelz CU License

Anorie's CU License

CU License Lacarolita's Designz

CU License Tezza'a Dezignz

CU License Scrap and Tubes

Cakie Pot Pie CU License

Denise Creationz CU License

EW CU License

FDM CU License

More shops I CT for & Love


 "
"


0 comments:
Post a Comment