


Wednesday, July 3, 2013

Tutorial using the Emo Pride scrap kit by Wicked Creationz Scraps
Supplies Needed
Paint Shop Pro - I am using X5, but any should do
The Emo Pride scrap kit by Wicked Creationz Scraps, which can be purchased at the Scrappin Dollars HERE
Any color or gradient and font of your choosing
Any mask of your choosing
Okay, let's begin. The first thing you will need to do, is to start a new image in Paint Shop Pro (PSP for short). To do this, look at the top left corner, and click on FILE>NEW> a pop up will open...set width and height to 600, make background transparent, and make sure the transparent box is checked. Click okay, and you now have a blank size base for your tag, already sized and ready to go.
***(NOTE: there is a layers menu on the right side of your screen..if u do not see it then look up top and click VIEW>PALETTES>LAYERS and it will open up...u use this layer to bring things to the front..say for example u put a shoe on the tag but it went behind a bucket and u want it in front of the bucket...while holding the left click button on your mouse or touch pad down, you would slide the shoe to the layer the bucket is on..it would now be in the front...use this anytime u want to bring something to the forefront.)***
I have chosen a mask from the Bunny's Attic. Okay, in Paint Shop Pro (PSP) click FILE>OPEN>and open the mask you have chosen, then start a new image FILE>NEW>600x600 and transparent needs to be checked. Choose color or gradient on the right side layers menu; I chose a metallic silver gradient...flood fill the new blank image with the color or gradient..the flood fill is the paint bucket shape. Now go to the top layers menu and click NEW MASK LAYER> from image...a pop up opens..click on the title of the mask you chose in the drop down menu. now go back to the side layers menu and click on the square that has the layers combined...right click it then click merge..the merge group..and voila..you have a mask layer now! :) Next add your paper...find and open paper#8, and copy it and paste it on the mask...then slide the mask layer on top of the paper. Reduce the mask layer by pushing in the corners, until there is a nice perimeter of the outside that shows the paper.
Now, let's add some other items to start adding depth and dimension to our tag! Find the included Trista poser and open her. Reduce her by 55% and center her on the tag, but going slightly towards the right side. Now find and open the bow # 2 and reduce its size by 80%. Place it in the top left corner at an angle...then duplicate it and flip it horizontally. Repeat this process on the other 3 corners. Now find and open the bow #1 and reduce its size by 90%, and then place one in the center of each of the corner bows. Next, find and open the black ribbon and reduce the size by 75% and place it on the right side of the tag...duplicate it and flip it horizontally and place it on the left side. Now find and open the pink ribbon, and reduce its size by 75% and place it on the left side of the tag..now duplicate it and flip it horizontally and place it on the right side of the tag.
Now find and open the skull n ribbon and reduce the size by 95% and place in the right of the poser's hair. Now find and open the bear, and reduce the size by 80% and place on the left side at the bottom, and flip it horizontally. Now find and open the cupcake deluxe, and reduce the size by 85% and place it on the bottom right, and the use the side layers menu to slide the poser to the forefront. Now find and open the barbed wire heart, and increase the size by 35% and place centered behind the poser.
Now find and open the chalice with a rose and reduce the size by 90% and place it on the bottom left, on the left side of the bear, and under the balloons. Now find and open the Roses and reduce by 90% and place it on the bottom right side, to the right of the cupcake. Next, find and open the boot and reduce its size by 90%; flip it horizontally and place it on the bottom right, between the cupcake and the roses. Now find and open the skateboard, and reduce it by 90% and place it on the bottom left, under the bear. next, find and open the martini and reduce it by 95% and place it on the bottom right, between the bear's legs. Finally, open the guitar and reduce its size by 85% and place on the top left side at an angle...duplicate it and flip it horizontally and place it on the top left side.
You did it! You now have finished this tag. You will need to add copy wright info to your tag, as it is the law. Finally, add a name in any font and color of your choosing.
I hope you enjoyed this tutorial. If you did, please follow my blog and pass it along to others. If you make a tag using this tutorial, please send it to meat robynebutts@gmail.com, so I can place it on my blog.
Hugs and blessings,
Robyne
Matching timeline cover I created using the Emo Pride scrap kit by Wicked Creationz Scraps, which can be purchased at Scrappin Dollars HERE

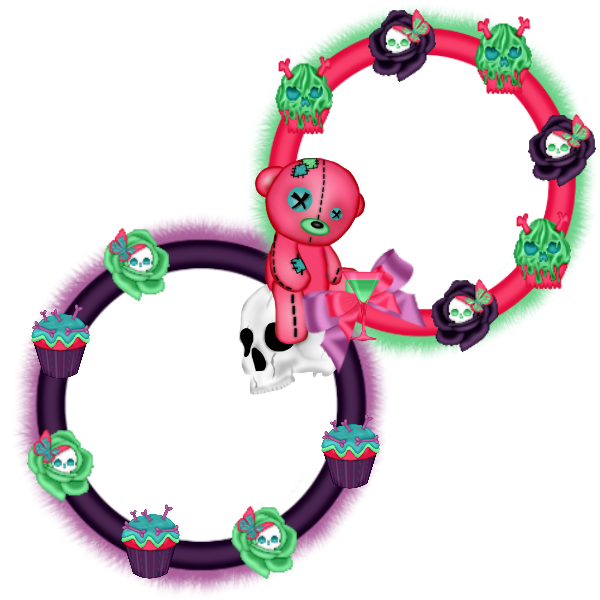
Preview of the FREEBIE cluster frame I created using the Emo Pride scrap kit by Wicked Creationz Scraps.

You can download this awesome FREEBIE cluster frame by simply right-clicking on the image below, and then saving it to your computer. (It is in PNG format). Please do NOT claim as your own work; please link back here to my blog, or to the link where this kit can be purchased...thank you!


Tutorial using the Emo Kisses scrap kit by Scraps by Danielle, and featuring the Deborah tube by VeryMany.
Supplies Needed
Paint Shop Pro - I am using X5, but any should do
The Emo Kisses scrap kit by Scraps by Danielle, which can be purchased at the Scraps by Danielle shop HERE
The Deborah tube by VeryMany, which is available at Pics for Design HERE
Any color or gradient and font of your choosing
Any mask of your choosing
Okay, let's begin. The first thing you will need to do, is to start a new image in Paint Shop Pro (PSP for short). To do this, look at the top left corner, and click on FILE>NEW> a pop up will open...set width and height to 600, make background transparent, and make sure the transparent box is checked. Click okay, and you now have a blank size base for your tag, already sized and ready to go.
***(NOTE: there is a layers menu on the right side of your screen..if u do not see it then look up top and click VIEW>PALETTES>LAYERS and it will open up...u use this layer to bring things to the front..say for example u put a shoe on the tag but it went behind a bucket and u want it in front of the bucket...while holding the left click button on your mouse or touch pad down, you would slide the shoe to the layer the bucket is on..it would now be in the front...use this anytime u want to bring something to the forefront.)***
I have chosen a mask from the PSP-Pals. Okay, in Paint Shop Pro (PSP) click FILE>OPEN>and open the mask you have chosen, then start a new image FILE>NEW>600x600 and transparent needs to be checked. Choose color or gradient on the right side layers menu; I chose a red, black, and brown gradient...flood fill the new blank image with the color or gradient..the flood fill is the paint bucket shape. Now go to the top layers menu and click NEW MASK LAYER> from image...a pop up opens..click on the title of the mask you chose in the drop down menu. now go back to the side layers menu and click on the square that has the layers combined...right click it then click merge..the merge group..and voila..you have a mask layer now! :) We will not be adding a paper to this tag.
Now, let's add some other items to start adding depth and dimension to our tag! Find the Deborah full view tube by VeryMany and open her. Reduce her by 40% and center her on the tag. Now find the bow 31 and open it, reduce its size by 80% and place on in each of the 4 corners, ensuring the sides are going in opposite directions. next, find and open the dice, and reduce them by 85%, and place them in the center of the corner bows, hanging down; again make sure the side are going in opposite directions. Next, find and open the lips #2 and reduce the size by 95% and place them in the center of the bows, covering up the string the dice are hanging from; once again, make sure the sides are going in opposite directions.
Now find and open the l0llipop trio and reduce the size by 80% and place on the left side at the top, and flip it horizontally...then duplicate and flip horizontally again and place on the right side towards the top. Next, find and open the emo shirt and reduce it by 80% and place on the right bottom. Now find and open the heart box and reduce it by 85% and place on the left of the shirt.
Now find and open the emo kitty and reduce her size by 80% and place her on the left bottom side. Next, find and open the cupcake and reduce it by 85% and place it on the left bottom side, on the right bottom of the cat. Next, find and open the heart frame with a bow, and leave the size as is and center it on the tag...use the side layers menu and slide it down to the mask layer, so it is behind all the other elements. Next duplicate it and flip it horizontally and place on top of the other one...you should now have a bow on each side of the tube's head. Next find and open the "I Love Emo" brad and reduce the size by 90, and place in the center of the bows on the heart frame.
You did it! You now have finished this tag. You will need to add copy wright info to your tag, as it is the law. Finally, add a name in any font and color of your choosing.
I hope you enjoyed this tutorial. If you did, please follow my blog and pass it along to others. If you make a tag using this tutorial, please send it to meat robynebutts@gmail.com, so I can place it on my blog.
Hugs and blessings,
Robyne
Matching timeline cover I created using the Emo Kisses scrap kit by Scraps by Danielle, and featuring the Deborah tube by VeryMany.

Preview of the freebie cluster frame I created using the Emo Kisses scrap kit by Scraps by Danielle, which can be purchased HERE

You can download this FREEBIE cluster frame by simply right-clicking on the image below, and then saving it to your computer. (It is in PNG format). Please do NOT claim this as your own work; either link back her to my blog, or link to the shop where this kit can be purchased...thank you!

Tuesday, July 2, 2013

Tutorial using the Tender love scrap kit by Sweet-PinUps, and featuring the Funny Sally tube, also by Sweet-PinUps.
Supplies Needed
Paint Shop Pro - I am using X5, but any should do
The Tender Love scrap kit by Sweet-PinUps, which can be purchased at Sweet-PinUps HERE
The Funny Sally tube by Sweet-PinUps, which is available at Pics for Design HERE
Any color or gradient and font of your choosing
Any mask of your choosing
Okay, let's begin. The first thing you will need to do, is to start a new image in Paint Shop Pro (PSP for short). To do this, look at the top left corner, and click on FILE>NEW> a pop up will open...set width and height to 600, make background white, and make sure the transparent box is not checked. Click okay, and you now have a blank size base for your tag, already sized and ready to go.
***(NOTE: there is a layers menu on the right side of your screen..if u do not see it then look up top and click VIEW>PALETTES>LAYERS and it will open up...u use this layer to bring things to the front..say for example u put a shoe on the tag but it went behind a bucket and u want it in front of the bucket...while holding the left click button on your mouse or touch pad down, you would slide the shoe to the layer the bucket is on..it would now be in the front...use this anytime u want to bring something to the forefront.)***
I have chosen a mask from the PSP-Pals. Okay, in Paint Shop Pro (PSP) click FILE>OPEN>and open the mask you have chosen, then start a new image FILE>NEW>600x600 and transparent needs to be checked. Choose color or gradient on the right side layers menu; I chose a lilac gradient...flood fill the new blank image with the color or gradient..the flood fill is the paint bucket shape. Now go to the top layers menu and click NEW MASK LAYER> from image...a pop up opens..click on the title of the mask you chose in the drop down menu. now go back to the side layers menu and click on the square that has the layers combined...right click it then click merge..the merge group..and voila..you have a mask layer now! :) We will not be adding a paper to this tag.
Now, let's add some other items to start adding depth and dimension to our tag! Find the Funny Sally tube by Sweet-PinUps, and hide all the elements you do not want on her (the signature, and the background...then merge the visible layers. Reduce her by 40% and center her on the tag.Now open the El #9 and reduce the size by 70% and center it on the tag. Next, find and open the El #16 and reduce it by 75%, and place on the left side...duplicate and flip it horizontally and place on the right side...turn both slightly to angle.
Now find the EL #24 and place on the bottom left. now find and open EL #19 and reduce its size by 35% and center it on the tag...duplicate and flip it horizontally and then slide down the layers menu, so that the El #16 is back in the forefront. now find and open EL#38 "LOVE" wordart and reduce it by 85% and place in the top right corner. Next find and open EL#40 "ME" wordart and reduce size by 85% and place on top right corner. Next, find and open the El#39 "Tender" and reduce the size by 85% and place in top right corner.
Next, find and open El#2 and reduce it by 80% and place on the bottom right, and angle it slightly. Now find and open EL#27 and reduce it by 70% and place on the left side at the top...duplicate and flip horizontally, and place on the top right area. lastly find and open EL#18 and reduce it by 65% and center it on the tag.
You did it! You now have finished this tag. You will need to add copy wright info to your tag, as it is the law. Finally, add a name in any font and color of your choosing.
I hope you enjoyed this tutorial. If you did, please follow my blog and pass it along to others. If you make a tag using this tutorial, please send it to meat robynebutts@gmail.com, so I can place it on my blog.
Hugs and blessings,
Robyne
Matching timeline cover I created using the Tender Love scrap kit, and the Funny sally tube, both by Sweet-PinUps!


Tutorial using the Flora scrap kit by MistyLynn's Creations and featuring the Luisa tube by Zlata_M
Supplies Needed
Paint Shop Pro - I am using X5, but any should do
The Flora scrap kit by MistyLynn's Creations, which can be purchased at Scraps and the City HERE
The Luisa tube by Zlata_M, which is available at Pics for Design HERE
Any color or gradient and font of your choosing
Any mask of your choosing
Okay, let's begin. The first thing you will need to do, is to start a new image in Paint Shop Pro (PSP for short). To do this, look at the top left corner, and click on FILE>NEW> a pop up will open...set width and height to 600, make background white, and make sure the transparent box is not checked. Click okay, and you now have a blank size base for your tag, already sized and ready to go.
***(NOTE: there is a layers menu on the right side of your screen..if u do not see it then look up top and click VIEW>PALETTES>LAYERS and it will open up...u use this layer to bring things to the front..say for example u put a shoe on the tag but it went behind a bucket and u want it in front of the bucket...while holding the left click button on your mouse or touch pad down, you would slide the shoe to the layer the bucket is on..it would now be in the front...use this anytime u want to bring something to the forefront.)***
I have chosen a mask from the Aimoo.com. Okay, in Paint Shop Pro (PSP) click FILE>OPEN>and open the mask you have chosen, then start a new image FILE>NEW>600x600 and transparent needs to be checked. Choose color or gradient on the right side layers menu; I chose a teal and blue gradient...flood fill the new blank image with the color or gradient..the flood fill is the paint bucket shape. Now go to the top layers menu and click NEW MASK LAYER> from image...a pop up opens..click on the title of the mask you chose in the drop down menu. now go back to the side layers menu and click on the square that has the layers combined...right click it then click merge..the merge group..and voila..you have a mask layer now! :) We will not be adding a paper to this tag.
Now, let's add some other items to start adding depth and dimension to our tag! Find the Luisa tube by Zlata_M, and hide all the elements you do not want on her (tats, the signature, and the background...then merge the visible layers. Reduce her by 40% and center her on the tag.Now open the wire and leave the size as is, and center it on the tag .Make sure it is on top of the mask layer. Next find and open the fire #1 and place it at the bottom of the tag, decrease it by width and increase the length until it goes completely from side to side.
Now find the cupcake #2 and open it and reduce it by 80% and place it on the left bottom. Next, find and open the bracelet #2 and reduce the size by 75%. Now find and open the drink #2, and reduce it by 85% and place it on the left bottom, behind the cupcake. Next find and open the skull candy #1 and reduce it by 90% and place it on the bottom left, above the bracelet. Now open the skull flower #1 and reduce its size by 85% and place it on the bottom left, right above the candy.
Next find and open the bunny and reduce it by 805 and place it on the right bottom side of the poser. Next find and open the skull candy 2 sucker, and reduce the size by 85% and place it on the right of the bunny. Now open the skull flower #4 and reduce its size by 805 and place on the right bottom, on the stick of the sucker. Next open the shoe #2 and reduce it by 90% and place it on the bottom right, by the flower.
Now find and open the frame #1 and reduce its size by 65% and place it to the left of the tube, towards the top. Find and open paper #8 and reduce the size by 85% and place it underneath the frame...use the eraser tool to erase any paper that is still hanging outside the frame. Now add the close up #2 of the Luisa tube and reduce her to fit inside the frame...again, use the eraser to erase anything hanging outside the frame. Now go to the Effects menu and make the tube black and white. Now open the bow #2 and reduce by 70% and place on bottom of frame. then open the bow # 1 and reduce by 85% and place centered on the other bow.
Now find and open the frame #2 and reduce its size by 65% and place it to the left of the tube, towards the top. Find and open paper #3 and reduce the size by 85% and place it underneath the frame...use the eraser tool to erase any paper that is still hanging outside the frame. Now add the close up #2 of the Luisa tube and reduce her to fit inside the frame...again, use the eraser to erase anything hanging outside the frame. Now go to the Effects menu and make the tube sepia. Lastly, find and open the butterfly #3 and place towards the right top of the frame.
You did it! You now have finished this tag. You will need to add copy wright info to your tag, as it is the law. Finally, add a name in any font and color of your choosing.
I hope you enjoyed this tutorial. If you did, please follow my blog and pass it along to others. If you make a tag using this tutorial, please send it to meat robynebutts@gmail.com, so I can place it on my blog.
Hugs and blessings,
Robyne
Matching timeline cover I created using the Flora scrap kit by MistyLynn's Creations, and the Luisa tube by Zlata_M.

Preview of the FREEBIE cluster frame I created using the Flora scrap kit by MistyLynn's Creations, which is available for purchase at Scraps and the City.

FREEBIE Frame can be downloaded by right-clicking on the image below, and then saving it to your computer. (It is in PNG format). Please do NOT claim this as your own work..please either link back here to my blog, or to the link where this kit can be purchased...thank you!
Monday, July 1, 2013

Tutorial using the Emo Fairy 2 scrap kit by Angel's Designz.
Supplies Needed
Paint Shop Pro - I am using X5, but any should do
The Emo Fairy 2 scrap kit by Angel's Designz, which can be purchased at Scrap Candy HERE
Any color or gradient and font of your choosing
Okay, let's begin. The first thing you will need to do, is to start a new image in Paint Shop Pro (PSP for short). To do this, look at the top left corner, and click on FILE>NEW> a pop up will open...set width and height to 600, make background white, and make sure the transparent box is not checked. Click okay, and you now have a blank size base for your tag, already sized and ready to go.
***(NOTE: there is a layers menu on the right side of your screen..if u do not see it then look up top and click VIEW>PALETTES>LAYERS and it will open up...u use this layer to bring things to the front..say for example u put a shoe on the tag but it went behind a bucket and u want it in front of the bucket...while holding the left click button on your mouse or touch pad down, you would slide the shoe to the layer the bucket is on..it would now be in the front...use this anytime u want to bring something to the forefront.)***
Okay....Let's get started!!!! :)
Open paper #5 and reduce the size to fit the tag. Now find the the little fairy tube and open her, leave her size as is and center her on the tag, towards the bottom. Next, find and open the bow #1 and reduce the size by 85% and place on in each of the four corners, making sure the sides are going in opposite directions. Find and open the button and reduce it by 90% and place one centered on each of the corner bows. Now find and open the chain, and place it at the top of the tag, increase the width until it goes from one side to the other...make sure the bows and buttons stay in the front.
Find and open the clouds, and leave the size as is. Place one at the top left, and then duplicate it and flip it horizontally, and place on the right top...increase the width of both sides to go all the way from side to side; now use the side layers menu and slide the chain back to the forefront. Find and open the grass, and leave the size as is, and place it at the bottom and stretch it to go from side to side. Next find and open the log and reduce its size by 65% and place on the bottom right at an angle, duplicate and flip it horizontally and place at an angle on the bottom left...now slide the fairy back to the forefront. Now find and open the mushroom house and leave the size as is and place it on the right bottom, and slide it down to the grass layer. Now find and open the sign, and reduce the size by 50% and the place on the left bottom area.
Now find and open the cauldron and reduce it by 65% and place it on the right bottom, to the right of the sign, and then slide up to the grass layer. now find and open the lantern and reduce it by 65% and place it on the right end of the chain up top, then duplicate and flip it horizontally and place at the top left of the chain. Now find and open the tree and leave it sized as is, and center it on the tag. next, find and open the skull candle and reduce the size by 85% and place at the bottom of the sign, and slide it to the forefront.
Now find and open the chocolate heart and reduce its size by 80% and place it at the top, centered on the center of the chain,,,,slide it to the forefront.
Now find and open the fairy potion #1 and reduce its size by 95% and place it on the left bottom area, on the right side of the cauldron. Next find and open the potion #2 and reduce it by 97% and place it to the left of the potion #1. Next, find and open the vine, and reduce the size by 70%, and place on the bottom right side, and slide it to the back using side layers menu...duplicate and flip it horizontally and place on the left bottom side...again, slide it to the background. Now find and open the fairy dust #2 and reduce the size by 75%, and place on the top left, duplicate and flip it horizontally, and place it on the top right side...slide the tree back to the forefront.
Next, find and open the cat on the skull and reduce the size by 80% and place it on the right log, and then use the side layers menu and slide it to the forefront. Now find and open the tea light candle and reduce its size by 95% and place on the top of the sign. Lastly, find and open the sparkles #1 and then leave the size as is, and center it on the tag.
You did it! You now have finished this tag. You will need to add copy wright info to your tag, as it is the law. Finally, add a name in any font and color of your choosing.
I hope you enjoyed this tutorial. If you did, please follow my blog and pass it along to others. If you make a tag using this tutorial, please send it to meat robynebutts@gmail.com, so I can place it on my blog.
Hugs and blessings,
Robyne
Matching timeline cover I created using the Emo Fairy 2 scrap kit by Angel's Designz, which can be purchased at Scrap Candy.

Preview of the FREEBIE cluster frame that I created using the Emo Fairy 2 scrap kit by Angel's Designz.

You can download this FREEBIE cluster frame, by simply right-clicking on it and then saving it to your computer. (It is in PNG format). Please do not claim this as your own work, either link back here to my blog, or link to the shop where this kit can be purchased...thank you!


Tutorial using the Steampunk Doll scrap kit by Bookworm Dezines, and featuring the Punky Sweet tube by Arthur Crowe.
Supplies Needed
Paint Shop Pro - I am using X5, but any should do
The Steampunk Doll scrap kit by Bookworm Dezines, which can be purchased at Scrap Candy HERE
The Punky Sweet tube by Arthur Crowe, which is available at Arthur Crowe's Factory HERE
Any color or gradient and font of your choosing
Any mask of your choosing
Okay, let's begin. The first thing you will need to do, is to start a new image in Paint Shop Pro (PSP for short). To do this, look at the top left corner, and click on FILE>NEW> a pop up will open...set width and height to 600, make background white, and make sure the transparent box is not checked. Click okay, and you now have a blank size base for your tag, already sized and ready to go.
***(NOTE: there is a layers menu on the right side of your screen..if u do not see it then look up top and click VIEW>PALETTES>LAYERS and it will open up...u use this layer to bring things to the front..say for example u put a shoe on the tag but it went behind a bucket and u want it in front of the bucket...while holding the left click button on your mouse or touch pad down, you would slide the shoe to the layer the bucket is on..it would now be in the front...use this anytime u want to bring something to the forefront.)***
I have chosen a mask from the Aimoo.com. Okay, in Paint Shop Pro (PSP) click FILE>OPEN>and open the mask you have chosen, then start a new image FILE>NEW>600x600 and transparent needs to be checked. Choose color or gradient on the right side layers menu; I chose a red, black, and brown gradient...flood fill the new blank image with the color or gradient..the flood fill is the paint bucket shape. Now go to the top layers menu and click NEW MASK LAYER> from image...a pop up opens..click on the title of the mask you chose in the drop down menu. now go back to the side layers menu and click on the square that has the layers combined...right click it then click merge..the merge group..and voila..you have a mask layer now! :) We will not be adding a paper to this tag.
Now, let's add some other items to start adding depth and dimension to our tag! Find the Punky Sweet tube by Arthur Crowe, and hide all the elements you do not want on her (tats, the signature, and the background...then merge the visible layers. Reduce her by 40% and center her on the tag, but a bit to the left. Now find the El #19 and reduce it by 40% and center it behind the tube. Next find and open El #2 and then reduce it by 75% and place on the right bottom of the tag. Now find the El#3 and reduce it by 80% and place it on the left side, slightly above the center area.
Next find EL #24 and open it, and reduce its size by 80% and place on the bottom left and turn it slightly. Next find and open the EL 326 and reduce its size by 70% and place it on the center right, and turn it slightly...then duplicate it and flip it horizontally and place it on the left center by the light bulb and turn. Next find and open the El#5, and reduce its size by 90% and angle it on the top left. Next find EL#8 and reduce it by 80% and place it on the bottom right, under the rose. Next find the EL#4 and reduce it by 95% and place it on the tight, under the gear, and on the top left under the clock. Lastly find and open the El#40 sparkles and leave the size as is...place it on the tag in 1/3rds, duplicating and flipping horizontally and vertically, until you are happy with how it looks.
You did it! You now have finished this tag. You will need to add copy wright info to your tag, as it is the law. Finally, add a name in any font and color of your choosing.
I hope you enjoyed this tutorial. If you did, please follow my blog and pass it along to others. If you make a tag using this tutorial, please send it to meat robynebutts@gmail.com, so I can place it on my blog.
Hugs and blessings,
Robyne
Matching timeline cover I created using the Steampunk Doll scrap kit by Bookworm Dezines, and the Punky Sweet tube by Arthur Crowe.

Preview of the freebie cluster frame I created using the Steampunk Doll scrap kit by Bookworm Dezines.

You can download this frame by simply right-clicking on the image below, and saving it to your computer. (It is in PNG format). Please do not claim as your own work...please link back here to my blog, or to the shop where this kit can be purchased...thank you!

Subscribe to:
Posts
(Atom)
Licensed Reseller

Beautiful Blog Award

Designer That Inspires Award

Blog I Love Award

Rawk My Socks Award

CU License Tagging Obsessions
Niqui Designs CU License

CU License Scraps Dimensions

DzinesByMelz CU License

Anorie's CU License

CU License Lacarolita's Designz
CU License Tezza'a Dezignz

CU License Scrap and Tubes

Cakie Pot Pie CU License

Denise Creationz CU License

EW CU License

FDM CU License

More shops I CT for & Love


 "
"


