


Sunday, October 6, 2013

Preview of the Fall Splendor scrap kit by Bookworm Dezines!
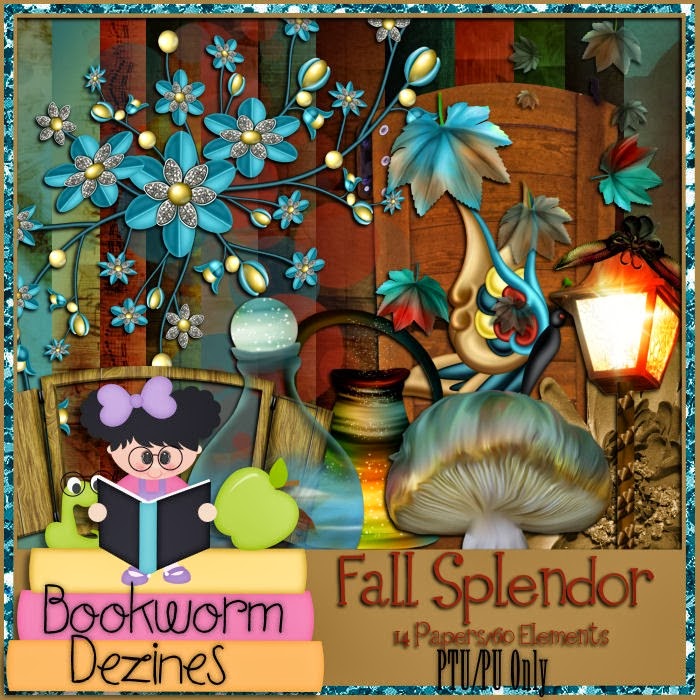
Tutorial using the Fall Splendor scrap kit by Bookworm Dezines, and featuring the Romance Spring tube by Zlata_M.
Supplies Needed
Paint Shop Pro - I am using X5, but any should do!
The Fall Splendor scrap kit by Bookworm Dezines, which can be purchased at Scrap Candy HERE
The Romance Sprint tube by Zlata_M, which can be purchased at Pics for Design HERE
Any color or gradient and font of your choosing
Any mask of your choosing
Okay, let's begin. The first thing you will need to do, is to start a new image in Paint Shop Pro (PSP for short). To do this, look at the top left corner, and click on FILE>NEW> a pop up will open...set width and height to 600, make background transparent, and make sure the transparent box is checked. Click okay, and you now have a blank size base for your tag, already sized and ready to go. Now add your background paper. I have chosen the paper #2. Open the paper, then copy and paste it to the blank image, and then reduce the size to fit.
***(NOTE: there is a layers menu on the right side of your screen..if u do not see it then look up top and click VIEW>PALETTES>LAYERS and it will open up...u use this layer to bring things to the front..say for example u put a shoe on the tag but it went behind a bucket and u want it in front of the bucket...while holding the left click button on your mouse or touch pad down, you would slide the shoe to the layer the bucket is on..it would now be in the front...use this anytime u want to bring something to the forefront.)***
I have chosen a mask from Moonbeams & Spiderwebs #35. Okay, in Paint Shop Pro (PSP) click FILE>OPEN>and open the mask you have chosen, then start a new image FILE>NEW>600x600 and transparent needs to be checked. Choose color or gradient on the right side layers menu; I chose a blue and green gradient...flood fill the new blank image with the color or gradient..the flood fill is the paint bucket shape. Now go to the top layers menu and click NEW MASK LAYER> from image...a pop up opens..click on the title of the mask you chose in the drop down menu. Now go back to the side layers menu and click on the square that has the layers combined...right click it then click merge..the merge group..and voila..you have a mask layer now! :) Just copy and paste it to the tag, and make sure it is on front of the paper.
Now, let's add some other items to start adding depth and dimension to our tag! The first thing we want to do, is add the El #5 the bench. Open the bench and reduce it by 35%, center it and move it closer to the bottom. The next thing we want to do is to add our tube; find and open the Romance Spring tube and make sure she has on the brown outfit and shoes...reduce her size 35% and place her on the bench..flip her horizontally and move it to the right side of the bench. Next, find the El #9 and reduce it by 70% and place on the bottom right of the bench. Next, find and open the El #58 the tree lamp and reduce it by 75%, and place it on the left side and hide the roots of it behind the tube's shoes.
Next, find and open the El #34 the mushroom group and reduce it by 80% and place it on the bottom left, in front of the bench. Next, find and open the El #23 the mushroom and reduce it by 85% and place it on the bottom right, slightly behind the stump. Next, find and open the El# 5 and reduce it by 75% and place it on the top left...duplicate it and flip it horizontally, and place it on the top right.
Next, find and open the El #22 the squirrel and reduce it by 90%, and place it on the bottom, to the left of the stump and mushroom. Next, find and open the El #33 the acorn and reduce it by 97% and place one on each side of the mushroom bunch and the stump and mushroom, going in opposite directions. Next, find and open the El #17 the door, and reduce it by 40% and place it on the right side, behind the bench. Next, find and open the El #55 the yellow flower bunch and reduce it by 85% and place it at the top right of the door, covering the hinges...duplicate it and flip this one horizontally and place at the bottom of the first one.
Next, find and open the El #35 the blue flower bunch and reduce it by 70% and place it on the right at the bottom of the yellow flowers...duplicate and flip it horizontally and place on the left side. Next, find and open the El #6 the string lights and reduce it by 75% and place in the top left corner...duplicate it and flip it horizontally and place in the top right corner. Next, find and open the El #36 the grape bunch and reduce it by 95% and place on the right of the bench...duplicate and flip it horizontally and move it over slightly...repeat process on the other side.
Next, find and open the El #4 the lamp and reduce it by 95% and place it on top of the stump, make sure it is in the forefront. Next, find and open the El #11 the owl and reduce it by 95% and place on the top back of the bench.Next, find and open the El #1 and reduce it by 30% and place on the top left...duplicate it, flip it horizontally and place on the top right.
Next, find and open the El #2 and reduce it by 95% and place it on the top left of the lamp. Next, find and open El #21 and reduce it by 95% and place it on the left top of the door. Next, find and open the El#14 the lamp post and reduce it by 70% and place it on the right side...make sure it is behind the grapes. Next, find and open the El # 28 and reduce it by 95% and place it in the top left corner...duplicate it, flip it horizontally, and place it in the top right corner. Finally, find and open El #60 and reduce it by 30% and place it across the bottom of the tag...make sure it goes from side to side.
Next,f
Lastly, use the effects menu and add 3D drop shadows wherever you would like them to be. Make sure at this point that you add the copyright information (VERY IMPORTANT)!!
You did it! You now have finished this tag. Finally, add a name in any font and color of your choosing. I hope you enjoyed this tutorial. If you did, please follow my blog and pass it along to others. If you make a tag using this tutorial, please send it to meat robynebutts@gmail.com, so I can place it on my blog.
Hugs and blessings,
Robyne

Preview of the Pink for Hope scrap kit by Manipulated by Magik!

You can check out her blog : HERE
Tutorial using the Pink for Hope scrap kit by Manipulated by Magik.
Supplies Needed
Paint Shop Pro - I am using X5, but any should do!The Black Angel tube by Alex_
The Pink for Hope scrap kit by Manipulated by Magik, which can be purchased at Thrifty Scraps HERE
Any color or gradient and font of your choosing
Any mask of your choosing
Okay, let's begin. The first thing you will need to do, is to start a new image in Paint Shop Pro (PSP for short). To do this, look at the top left corner, and click on FILE>NEW> a pop up will open...set width and height to 600, make background transparent, and make sure the transparent box is checked. Click okay, and you now have a blank size base for your tag, already sized and ready to go. Now add your background paper. I have chosen the paper #8. Open the paper, then copy and paste it to the blank image, and then reduce the size to fit.
***(NOTE: there is a layers menu on the right side of your screen..if u do not see it then look up top and click VIEW>PALETTES>LAYERS and it will open up...u use this layer to bring things to the front..say for example u put a shoe on the tag but it went behind a bucket and u want it in front of the bucket...while holding the left click button on your mouse or touch pad down, you would slide the shoe to the layer the bucket is on..it would now be in the front...use this anytime u want to bring something to the forefront.)***
I have chosen a mask from Moonbeams & Spiderwebs #22. Okay, in Paint Shop Pro (PSP) click FILE>OPEN>and open the mask you have chosen, then start a new image FILE>NEW>600x600 and transparent needs to be checked. Choose color or gradient on the right side layers menu; I chose a metallic silver gradient...flood fill the new blank image with the color or gradient..the flood fill is the paint bucket shape. Now go to the top layers menu and click NEW MASK LAYER> from image...a pop up opens..click on the title of the mask you chose in the drop down menu. Now go back to the side layers menu and click on the square that has the layers combined...right click it then click merge..the merge group..and voila..you have a mask layer now! :) Just copy and paste it to the tag, and make sure it is on front of the paper...increase the size by 20%...and center it.
Now, let's add some other items to start adding depth and dimension to our tag! The first thing we want to do, is add the wire heart..so open the heart and increase it by 20% and center it on top of the mask. The next thing we want to do is to add our girl. Find and open the pink girl, reduce her size by 30% and center her on the tag, towards the bottom. Next, find the bear and reduce it by 60% and place it at the bottom right of the girl...make sure it is in the forefront. Next, find and open the bow #2 and reduce it by 40%...place it in the top right corner...duplicate it and flip it horizontally, and place in the top left corner.
Next, find and open the light pink bow, and reduce it by 70%...place it centered in the darker bow in the top right corner...duplicate it and flip it horizontally and do the same on the top left. Next, find and open the heart dangly, and reduce it by 70% and hang it from the left top corner bows, where the top is slightly hidden behind the bows...duplicate and flip it horizontally and place it on the top right. Next, find and open the wings, and leave them sized as is...center it behind the girl's shoulders.
Next, find and open the heart ribbon and reduce it by 60% and place it on the bottom right, on the layer in front of the bear. Next, find and open the diamond and reduce it by 40%, and place it on the bottom left, slightly behind the girl. Next, find and open the rose with feathers and pearls, and reduce it by 30% and place it in the bottom left corner. Next, find and open the ribbon angel and reduce it by 60% and place it on the left side...duplicate it and flip it horizontally, and place it on the right side.
Next, find and open the mask and reduce it by 40%, and place it on the bottom left of the diamond, and slightly above it. Next, find and open the deco and reduce it by 20%...place it on the right bottom area where the flower shows...duplicate and place towards the top...repeat process on the other side, only flipping it horizontally. Next, find and open the bracelet and reduce it by 70% and place on the bottom right, behind the deco..you will want the silver part to be clear to read.
Next, find and open the sparkles and leave it sized as is...place it on the top 1/3 of the tag...then duplicate it and flip it horizontally...duplicate again and place on center 1/3...duplicate and flip it horizontally...duplicate again and flip it vertically and place on bottom 1/3...duplicate one more time and flip it horizontally. Next, find and open the dove and reduce it by 75% and place it on the top center next to the left bows...duplicate it and flip it horizontally and place by the right bows.
Lastly, use the effects menu and add 3D drop shadows wherever you would like them to be. Make sure at this point that you add the copyright information (VERY IMPORTANT)!!
You did it! You now have finished this tag. Finally, add a name in any font and color of your choosing. I hope you enjoyed this tutorial. If you did, please follow my blog and pass it along to others. If you make a tag using this tutorial, please send it to meat robynebutts@gmail.com, so I can place it on my blog.
Hugs and blessings,
Robyne
Saturday, October 5, 2013

Preview of the Mysterious Halloween scrap kit!

Tutorial using the Mysterious Halloween scrap kit by Puddicat Creations, which is available at the Scrap Candy Shop HERE
Supplies Needed
Paint Shop Pro - I am using X5, but any should do
The Mysterious Halloween scrap kit by Puddicat Creations, which can be purchased at Scrap Candy HERE
You will not need a tube, as this kit has 3 different witch posers included.
Any color or gradient and font of your choosing
Any mask of your choosing
Okay, let's begin. The first thing you will need to do, is to start a new image in Paint Shop Pro (PSP for short). To do this, look at the top left corner, and click on FILE>NEW> a pop up will open...set width and height to 600, make background transparent, and make sure the transparent box is checked. Click okay, and you now have a blank size base for your tag, already sized and ready to go. Now add your background paper. I have chosen the paper #2. Open the paper, then copy and paste it to the blank image, and then reduce the size to fit.
***(NOTE: there is a layers menu on the right side of your screen..if u do not see it then look up top and click VIEW>PALETTES>LAYERS and it will open up...u use this layer to bring things to the front..say for example u put a shoe on the tag but it went behind a bucket and u want it in front of the bucket...while holding the left click button on your mouse or touch pad down, you would slide the shoe to the layer the bucket is on..it would now be in the front...use this anytime u want to bring something to the forefront.)***
I have chosen a mask from Monnbeams & Spiderwebs #8. Okay, in Paint Shop Pro (PSP) click FILE>OPEN>and open the mask you have chosen, then start a new image FILE>NEW>600x600 and transparent needs to be checked. Choose color or gradient on the right side layers menu; I chose a metallic brass gradient...flood fill the new blank image with the color or gradient..the flood fill is the paint bucket shape. Now go to the top layers menu and click NEW MASK LAYER> from image...a pop up opens..click on the title of the mask you chose in the drop down menu. Now go back to the side layers menu and click on the square that has the layers combined...right click it then click merge..the merge group..and voila..you have a mask layer now! :) Just copy and paste it to the tag, and make sure it is on front of the paper.
Now, let's add some other items to start adding depth and dimension to our tag! The first thing we want to do, is to add our witch. Open the witch #2 element, and reduce her size by 25% and place her on the left side of the tube. Next, find the El house #1 and open it, and reduce it by 70% and place it on the far back right side of the tag, towards the center area. Next, find and open El tree #1 and reduce its size by 35% and place it at the center top, then slide the witch to the forefront.
Next, find and open El cauldron#1 and reduce the size by 45%, and place it on the left bottom side of the tag, at the bottom left of the witch..make sure the witch is in the forefront. Next, find and open the El ladder #1 and reduce the size by 87& and place it against the right side of the house. Next, find and open El branch and reduce it by 70%, and place it in the top right corner of the tag, making sure it is on top of the mask layer.
Next, find and open El bird #2 and reduce the size by 90%..this is the white owl...place it on top of the right side of the house. Next, find and open the El books and reduce them by 80%, and place them on the bottom right, in front of the witch. Next, find and open El books #2 and reduce it by 85% and place it behind the other books and to the right. Next, find and open El grass #1 and reduce it by 40%, and place it on the bottom right...duplicate it and move this ne over to the edge of the tag...now duplicate and flip it and place it on the bottom left...duplicate again and place against the edge of the bottom left...slide the cauldron and the witch back to the forefront.
Next, find and open El #deco#1 and reduce it by 65% and place it in the top left corner hanging down; duplicate it and place the start of this one at the bottom of the first one...make sure they are in front of the witch layer. Next, find and open El pumpkin #2 and reduce it by 75% and place it on the right side above the books. Next, find and open El cat #1 and reduce it by 90% and place it on the bottom right side; slide it to be in front of the books
Next, find and open El flog #1 and leave the size as is and place it in the top left area; make sure it is behind the mask layer. Next, find and open El deco #3 and reduce it by 95% and place it on the left bottom, in front of the cauldron. Next, find and open El leaves #11 and reduce the size by 80% and place them across the very bottom of the tag. Lastly, find and open El bird #3 and reduce it by 95% and place it on top of the back of the cauldron.
Finally, you can use the effects menu and add 3D drop shadows wherever you would like them to be. Make sure at this point that you add the copyright information for the tube artist!! (VERY IMPORTANT)
You did it! You now have finished this tag. Finally, add a name in any font and color of your choosing. I hope you enjoyed this tutorial. If you did, please follow my blog and pass it along to others. If you make a tag using this tutorial, please send it to meat robynebutts@gmail.com, so I can place it on my blog.
Hugs and blessings,
Robyne

Preview of the Karina scrap Kit

Tutorial using the Karina scrap kit by Hania's Designs, and featuring the 2013 Classic Beauty tube by Ismael Rac.
Supplies Needed
Paint Shop Pro - I am using X5, but any should do
The Karina scrap kit by Hania's Designs, which can be purchased at Scraps and the City HERE
The 2013 Classic Beauty tube by Ismael rac, which can be purchased at the XeracX shop at HERE
Any color or gradient and font of your choosing
Okay, let's begin. The first thing you will need to do, is to start a new image in Paint Shop Pro (PSP for short). To do this, look at the top left corner, and click on FILE>NEW> a pop up will open...set width and height to 600, make background transparent, and make sure the transparent box is checked. Click okay, and you now have a blank size base for your tag, already sized and ready to go. Now add your background paper. I have chosen the paper #4. Open the paper, then copy and paste it to the blank image, and then reduce the size to fit.
***(NOTE: there is a layers menu on the right side of your screen..if u do not see it then look up top and click VIEW>PALETTES>LAYERS and it will open up...u use this layer to bring things to the front..say for example u put a shoe on the tag but it went behind a bucket and u want it in front of the bucket...while holding the left click button on your mouse or touch pad down, you would slide the shoe to the layer the bucket is on..it would now be in the front...use this anytime u want to bring something to the forefront.)***
Now, let's add some other items to start adding depth and dimension to our tag! The first thing we want to do, is to add our tube. Find and open the 2013 Classic Beauty tube by Ismael Rac; make sure she has on the white dress, shoes, and bow, and dark lips and nails...merge all visible layers, and then copy and paste her to the tag. Reduce her size by 70% and center her on the tag, towards the bottom. Next, find the El # 41 the pink clouds and place at the top left...duplicate and move it down slightly...duplicate again and flip it horizontally and pace on the top right...duplicate one more time and move down a bit. Next, find and open El #24 the clear circle, and increase it by 40%...place it in the center of the tag, behind the tube.
Next, find and open El# 64 the castle, and increasethe size by 35% and place on the right side of the tag, in front of the clouds and the circle. Next, find and open the El # 82 the fence and place it at the bottom of the tag, and have it in front of the circle and castle...bring the sides out. Next, find and open El # 83 the tree and reduce the sizeby 40%...place it on the left side of the tag...flip it horizontally, and make sure it is behind the fence.
Next, find and open El # 33 grass and leave the size as is...place it across the bottom of the fence, making sure it is in the forefront. Next, find and open the El # 72 the yorkie and reduce it by 50%, and place it at the bottom left of the tube, making sure it is in the forefront. Next, find and open El # 54 the string lights and reduce it by 70%...place at the top left...duplicate it and flip it horizontally and connect on the right side of the previous one...duplicate again, and flip it horizontally, and place on the top right...duplicate again and flip it horizontally and connect to the right and center one. Next, find and open El# 32 the bird and reduce it by 95%...place one on each far side top of the fence, going in opposite directions, and place one in the tree and one on the castle.
Next, find and open El # 75 white flower and reduce it by 60% and place in the top left corner and then duplicate and flip it horizontally and place in top right corner...go back and duplicate and flip both horizontally, so they are double thick. Next, find and open El# 77 butterflies and reduce by 80%, flip it vertically and place on left center to the right of the tree...flip it horizontally and place on left of tree. Next, find and open the El # 44 white flowers and reduce by 85% and place on the bottom left corner...duplicate and flip it horizontally and place in the bottom right corner...go back and duplicate and flip each one horizontally, so they are double thick and full. Next, find and open El # 35 the burgundy spikey flowers and reduce it by 90% and place on the bottom right, slightly covering the edge of the white flowers...duplicate and flip it horizontally and place on the bottom right.
Next, find and open El # 46 the pine comb and reduce it by 98% and place on the bottom left to the right of the burgundy flower...duplicate and flip it horizontally and place on the bottom right. Next, find and open El # 70 the violin and reduce it by 90% and place it on the bottom right, to the left of the pine comb, and angle it slightly. Next, find and open El# 9 the white heart and reduce it by 80% and place center top. Next, find and open El # 13 the pink heart and reduce it by 90% and place it inside the white heart. Next, find and open the light pink rose and reduce it by 95% and place it on the top left side of the white heart...duplicate it and flip it horizontally and place on the top right of the heart...go back and duplicate each and flip it horizontally, to make it double thick and full.
Make sure at this point that you add the copyright information for the tube artist!! (VERY IMPORTANT)...and personal as you wish!
You did it! You now have finished this tag. Finally, add a name in any font and color of your choosing. I hope you enjoyed this tutorial. If you did, please follow my blog and pass it along to others. If you make a tag using this tutorial, please send it to meat robynebutts@gmail.com, so I can place it on my blog.
Hugs and blessings,
Robyne
Thursday, October 3, 2013

Preview of kit!

You can check out her blog : HERE
Tutorial using the When Darkness Falls scrap kit by Heather's Devine Dezigns, and featuring the Black Angel tube by Alex_Prihodko.
Supplies Needed
Paint Shop Pro - I am using X5, but any should do
The When Darkness Falls scrap kit by Heather's Devine Dezigns, which can be purchased at Spazz Art HERE
The Black Angel tube by Alex_Prihodko, which can be purchased at Pics for Design HERE
Any color or gradient and font of your choosing
Any mask of your choosing
Okay, let's begin. The first thing you will need to do, is to start a new image in Paint Shop Pro (PSP for short). To do this, look at the top left corner, and click on FILE>NEW> a pop up will open...set width and height to 600, make background transparent, and make sure the transparent box is checked. Click okay, and you now have a blank size base for your tag, already sized and ready to go. Now add your background paper. I have chosen the paper #1. Open the paper, then copy and paste it to the blank image, and then reduce the size to fit.
***(NOTE: there is a layers menu on the right side of your screen..if u do not see it then look up top and click VIEW>PALETTES>LAYERS and it will open up...u use this layer to bring things to the front..say for example u put a shoe on the tag but it went behind a bucket and u want it in front of the bucket...while holding the left click button on your mouse or touch pad down, you would slide the shoe to the layer the bucket is on..it would now be in the front...use this anytime u want to bring something to the forefront.)***
I have chosen a mask from Sisterz PSP Treasures. Okay, in Paint Shop Pro (PSP) click FILE>OPEN>and open the mask you have chosen, then start a new image FILE>NEW>600x600 and transparent needs to be checked. Choose color or gradient on the right side layers menu; I chose a metallic silver gradient...flood fill the new blank image with the color or gradient..the flood fill is the paint bucket shape. Now go to the top layers menu and click NEW MASK LAYER> from image...a pop up opens..click on the title of the mask you chose in the drop down menu. Now go back to the side layers menu and click on the square that has the layers combined...right click it then click merge..the merge group..and voila..you have a mask layer now! :) Just copy and paste it to the tag, and make sure it is on front of the paper.
Now, let's add some other items to start adding depth and dimension to our tag! The first thing we want to do, is to add our tube. Find and open the Black Angel tube by Alex_Prihodko; make sure she has on the red boots and the hat..merge all visible layers, and then copy and paste her to the tag. Reduce her size by 70% and center her on the tag, towards the bottom. Next, find the El # 53 the brownish tree and open it..leave the size as it is and copy and paste it to the left of the tag...duplicate it and flip this one horizontally and place it on the right side of the tag. Next, find and open El #52 the gate, and copy and paste it onto your tag...center it and using the side layers menu place it behind the tree...increase size by 20%.
Next, find and open El# 6 the ghost and reduce his size by 60% and then copy and paste him onto the tag...place him centered between the two trees and make sure he is in front of the trees. Next, find and open the El #100 lightning and leave the size as it is...place on the top left of the tag behind the top of the gate post, then duplicate it and flip it horizontally..and place this one a little over from the first one...repeat this process on the top right side. Next, find and open El #41 the birds and open it...reduce the size by 40% and place then on the tag at the center top.
Next, find and open El #86 the moon and open it...reduce the size by 85% and place it in the top left area. Next, find and open the El #21 the cat and using the side layers menu slide it to be in front of the tube...reduce the size by 85% and place it on the right bottom...flip it horizontally. Next, find and open El #18 the book and place it in front of the bottom of the left tree and reduce the size by 40%. Next, find and open El#78 the bottle trio and place it at the right bottom, in front of the tree and behind the cat...reduce it by 40%.
Next, find and open El #74 the witches brew pot, and place it in front of the ghost and behind the book...reduce the size by 50%. Next, find and open El#77 the broom and leave the size as it is...place it in front of the gate on the right side, and behind the bottles. Next, find and open the El #42 the chalice and reduce it by 85%...then place it on the left side, above the book and behind it. Next, find and open El #35 the sword and reduce it by 85%...flip it horizontally and place it underneath the tube where the handle is at the right hand of the tube.
Next, find and open El # 45 the candle and reduce the size by 97% and place it to the right bottom of the tube's left leg and near the cat. Next, find and open El #34 the spider and place it on the gate at the top left area and reduce its size by 85%...duplicate it and flip this one horizontally and place it on the top right side of the gate. Next, find and open El# 44 and reduce it by 97% and place it in the top right corner...duplicate and place on bottom left hand corner...duplicate again and this time flip it horizontally and place on bottom right corner...duplicate this one and place in the top right corner.
Lastly, use the effects menu and add 3D drop shadows wherever you would like them to be. Make sure at this point that you add the copyright information for the tube artist!! (VERY IMPORTANT)
You did it! You now have finished this tag. Finally, add a name in any font and color of your choosing. I hope you enjoyed this tutorial. If you did, please follow my blog and pass it along to others. If you make a tag using this tutorial, please send it to meat robynebutts@gmail.com, so I can place it on my blog.
Hugs and blessings,
Robyne
Wednesday, October 2, 2013

Preview of the Autumn Symphony scrap kit by Vickie's Scraps!

Tutorial using the Autumn Symphony scrap kit by Vickie's Scraps, and featuring the Autumn Girl tube by Arthur Crowe.
Supplies Needed
Paint Shop Pro - I am using X5, but any should do
The Autumn Symphony scrap kit by Vickie's Scraps, which can be purchased on Vickie's Scraps blog HERE
The Autumn Girl tube by Arthur Crowe, which can be purchased at Arthur Crowe's Factory HERE
Any color or gradient and font of your choosing
Any mask of your choosing
Okay, let's begin. The first thing you will need to do, is to start a new image in Paint Shop Pro (PSP for short). To do this, look at the top left corner, and click on FILE>NEW> a pop up will open...set width and height to 600, make background transparent, and make sure the transparent box is checked. Click okay, and you now have a blank size base for your tag, already sized and ready to go. Now add your background paper. I have chosen the paper #18. Open the paper, then copy and paste it to the blank image, and then reduce the size to fit.
***(NOTE: there is a layers menu on the right side of your screen..if u do not see it then look up top and click VIEW>PALETTES>LAYERS and it will open up...u use this layer to bring things to the front..say for example u put a shoe on the tag but it went behind a bucket and u want it in front of the bucket...while holding the left click button on your mouse or touch pad down, you would slide the shoe to the layer the bucket is on..it would now be in the front...use this anytime u want to bring something to the forefront.)***
I have chosen a mask from Essex Girl. Okay, in Paint Shop Pro (PSP) click FILE>OPEN>and open the mask you have chosen, then start a new image FILE>NEW>600x600 and transparent needs to be checked. Choose color or gradient on the right side layers menu; I chose a olive green gradient...flood fill the new blank image with the color or gradient..the flood fill is the paint bucket shape. Now go to the top layers menu and click NEW MASK LAYER> from image...a pop up opens..click on the title of the mask you chose in the drop down menu. Now go back to the side layers menu and click on the square that has the layers combined...right click it then click merge..the merge group..and voila..you have a mask layer now! :) Just copy and paste it to the tag, and make sure it is on front of the paper.
Now, let's add some other items to start adding depth and dimension to our tag! The first thing we want to do, is to add our tube. Find and open the Autumn Girl tube by Arthur Crowe; remove all layers except the girl, and then copy and paste her to the tag. Reduce her size by 60% and center her on the tag. Next, find the El #97 the brown tree and open it. Reduce the size by 20% and then copy and paste it on the right side of the tag, towards the top, but not all the way at the top...duplicate it and then flip this 2nd one horizontally and place it on the left side of the tag. Adjust the tube if need be, so that her head is centered between the trees. Next, find and open El #53 the fence and reduce its size by 20%. Now copy and paste it onto the tag at the center area....slide it behind the trees using the side layers menu..make sure it goes from one side all the way to the other.
Next, find and open El# 63 grass and leave the size as it is. Place it at the bottom of the fence...slide it to be in front of the trees...duplicate it and flip the 2nd one horizontally and place it slightly below the other one. Next, find and open the El #62 grass and place it on the bottom left...duplicate and move up slightly...duplicate again and flip it horizontally and place this one on the bottom right..duplicate and move it slightly up. Use the side layers menu and slide the back grass to the forefront, where it is in front of this grass. Next, find and open El # 70 the rock path and increase its size by 15%. Place it at the bottom of the tag on make sure it is in front of the bottom grass...it should be below the tube.
Next, find and open El #50 the bench and reduce its size by 35%. Place it on the tag centered behind the tube...use the side layers menu and slide it to be in front of the rock path. Next, find and open the El #65 the grass bush and reduce its size by 70%. Place it on the right side of the tag in front of the bench leg...duplicate it and flip this one horizontally and place it on the left side in front of the bench legs. Next, find and open El #80 the bunch of yellow flowers and reduce the size by 85%. Place it on the right in front of the grass bush and at the bottom of the bush...duplicate it and flip it horizontally and place on the left side.
Next, find and open El #58 the tall cattails and leave the size as is. Place it on the right side, behind the grass bush...duplicate it and flip it horizontally and place it on the left side. Next, find and open El#83 the violin and bow and reduce the size by 90%, and place it on the right side in front of the bench. Next, find and open El#3 the yellow bird and reduce its size by 97% and place it atop the left side top of the bench. Next, find and open the El #5 the red apple and reduce its size by 98% and place it at the bottom of the tube, between her legs.
Next, find and open El #35 the purple and white flower and reduce the size by 98%. Start on the bottom left and place the first in the bottom left corner...duplicate and place to the right of the first on and slightly above it...duplicate again and flip this one horizontally and place to the right of the second one, level with the first one. Repeat this process on the bottom right of the tag. Next, find and open El #34 brown flower and reduce it by 97% and place on the bottom left in the open space between the purple and white flowers...duplicate it and flip it horizontally and place on the right side.
Next, find and open the El #32 the reddish leaf bunch and reduce the size by 75%. Place it in the top right corner, leaving and open area in the very top of the corner...duplicate and flip it horizontally and place in the same area on the top left corner. The last element will be El #56 the white stone...open it and reduce the size by 90% and place it in the area we left open in the top right corner...duplicate and flip it horizontally and place in the open area in the top left corner.
Lastly, use the effects menu and add 3d drop shadows wherever you would like them to be. Make sure at this point that you add the copyright information for the tube artist!! (VERY IMPORTANT)
You did it! You now have finished this tag. Finally, add a name in any font and color of your choosing. I hope you enjoyed this tutorial. If you did, please follow my blog and pass it along to others. If you make a tag using this tutorial, please send it to meat robynebutts@gmail.com, so I can place it on my blog.
Hugs and blessings,
Robyne
Subscribe to:
Comments
(Atom)
Licensed Reseller

Beautiful Blog Award

Designer That Inspires Award

Blog I Love Award

Rawk My Socks Award

CU License Tagging Obsessions

Niqui Designs CU License

CU License Scraps Dimensions

DzinesByMelz CU License

Anorie's CU License

CU License Lacarolita's Designz

CU License Tezza'a Dezignz

CU License Scrap and Tubes

Cakie Pot Pie CU License

Denise Creationz CU License

EW CU License

FDM CU License

More shops I CT for & Love


 "
"


