


Friday, May 2, 2014


Preview of the awesomely wicked Steampunk Warrior tube by the Hunter!

Preview of the kickin Steampunk Warrior scrap kit by Designs by Joan!

Snag tag #1

Snag tag #2

Snag tag #3

Snag tag #4

CT PTU TUT for the Steampunk Warrior tube by The Hunter, and the Steampunk Warrior kit match by Designs by Joan!
Materials Needed
The Steampunk Warrior tube by The Hunter, which can be purchased at S&CO HERE
The Steampunk Warrior kit match by Designs by Joan, which can also be purchased at S&CO HERE
Mask 254 by Wee Scots Lass, which can be downloaded on her blog HERE
PSP - I am using X5, but any should do
**This tutorial assumes that you have a working knowledge of basic functions in PSP. This tutorial is a creation of my own, and any similarities are purely coincidental. If you make something with one of my tuts or templates, please email it to me at robynebutts@gmail.com and I will post it her on my blog!
Okay, let's begin! Let's create our mask layer! Open whatever mask you chose, I chose a mask by WSL. Now create a new image 800x800, with a transparent back. Now for this mask, I used a paper instead of flood-filling; so open paper 3, and copy and paste it to the new image. Now, go to the top layers menu and click NEW MASK LAYER>FROM IMAGE..a pop up opens...click on the title of the mask you chose in the drop-down menu. Merge visible layers, then copy and paste it to the tag. Re-size and move as needed..for this one I left the size as is, and centered it..
Next, find and open the full-view of the tube, reduce it by 15%, and place on the left side of the tag.
Next, open the close up view of the tube...copy and paste it on the top right side of the mask..FH, erase any extra...invert and add screen blend mode.
Open el 24, reduce it by 30%, and place on the bottom right.
Open el 44, reduce by 20%, place on the left side, behind the tube...FH.
Open el 65, leaving the size as is, place on the top left, behind the tube.
Open el 45, reduce by 40%, place on bottom right, behind mushroom.
Open el 5, reduce by 405, place on bottom right, on other suitcase.
Open el 1, reduce by 80%, place on bottom left of suitcase.
Open el 11, reduce by 70%, place on bottom right behind the hat and mushroom.
Open el 10, reduce by 80%, place on top of suitcase.
Open el 28, reduce by 80%, place on bottom right, in front of mushroom.
Open el 49, reduce by 25%, place on right side, behind the suitcases.
Open el 42, reduce by 25%, place on left side, behind the tube.
Open el 62, reduce by 90%, place on suitcase.
Open el 48, reduce by 80%, place on suitcase.
Open el 46, reduce 60%, place on mushroom.
Open el 69, reduce by 60%, place on left, on ball stand.
Open el 21, reduce by 30%, place on left, over bike wheel, angled.
Open el 37, reduce by 90%, place on left, on ball stand.
Open el 52, reduce 85%, place on right, behind mushroom.
Open el 67, reduce 35%, place on right, against bike.
Open el 53, reduce 45%, place on right, on suitcase.
Open el 47, reduce 75%, place on right, behind suitcases.
Open el 25, reduce 80%, place on top left, on umbrella.
Open el 7, reduce 90%, place on bottom left, front of guitar.
Open el 71, reduce 60%, place on left side, on mask layer.
Open el 74, leaving the size as is, place on mask layer.
Lastly, add 3D drop shadows on whatever elements you would like them on. I like these settings: 2V 1H 70 op, 4B. Make sure at this point that you add copyright info for the tube artist..you can also add info for the scrap maker if the tube maker's TOU allows. Make sure you check TOU's!
You did it! You have completed this tut! Now you can add personalization to your creation! I hope you enjoyed this tutorial; if you did, please follow my blog, and pass it on to others! Also, please email your creations with my tuts or templates, and I will happily display them here on my blog (robynebutts@gmail.com)!
Hugz and Blessings,
Robyne'
Thursday, May 1, 2014


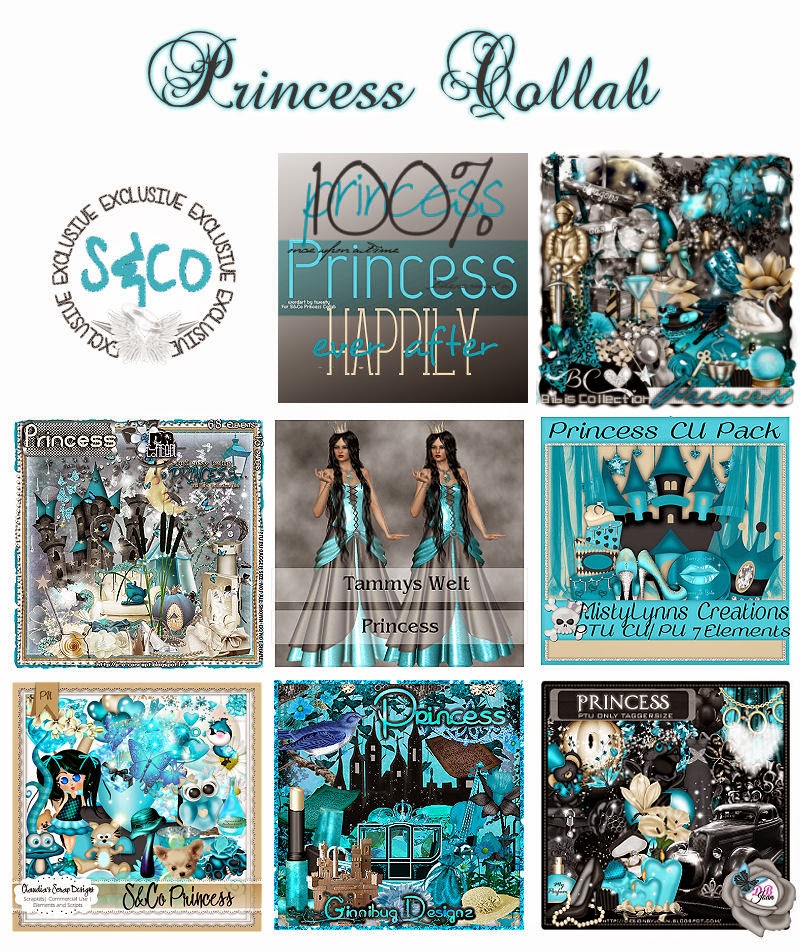


Preview of the awesome Harlequin tube by Danny Lee!

Preview of the stunning Harlequin kit by Designs by Joan!

CT PTU TUT for the Harlequin tube by Danny Lee, and the harlequin kit match by Designs by Joan!
Materials Needed
The Harlequin tube by Danny Lee, which can be purchased at S&CO HERE
The Harlequin kit match by Designs by Joan, which can also be purchased at S&CO HERE
PSP - I am using X5, but any should do
**This tutorial assumes that you have a working knowledge of basic functions in PSP. This tutorial is a creation of my own, and any similarities are purely coincidental. If you make something with one of my tuts or templates, please email it to me at robynebutts@gmail.com and I will post it her on my blog!
Okay, let's begin! Let's create our mask layer! Open whatever mask you chose. Now create a new image 800x800, with a transparent back. For this tag, we used a mask that is in the kit. So, open el 82, increase it by 25%, and center it on the new image. If you were adding a mask that you created, you would flood fill the new image with the color or gradient you like (or you can use a paper)go to the top layers menu and click NEW MASK LAYER>FROM IMAGE..a pop up opens...click on the title of the mask you chose in the drop-down menu. Merge visible layers, then copy and paste it to the image. Re-size and move as needed.
Next, find and open el 1, and reduce it by 15%, and place it at the bottom, in front of the mask layer.
Open the tube layer without the hat, reduce her by 35%, and center her on the right side of the floor.
Open el 36, and leaving the size as is, place it on the top left...FV.
Open el 38, and reduce by 15%, and place on the right side...FH.
Open el 81, and reduce by 35%, and place on the right side of the door..FH.
Open el 63, and reduce by 65%, place on the bottom left, where the door meets the floor.
Open el 44, and reduce by 90%, and place on the right, behind grass.
Open el 8, and reduce by 80%, and place on the top right.
Open el 10, reduce by 30%, and place on the bottom left.
Open el 22, reduce by 70%, and place top left corner.
Open el 24, reduce by 75%, and place top left, in the center of el 22.
Open el 32, reduce by 45%, place on bottom left, in front of table.
Open el 20, reduce by 65%, and place on the top left, on the swirl.
Open el 68, reduce by 80%, and place on table.
Open el 7, reduce by 80%, and place on bottom left, bottom of the chess piece.
Open el 85, reduce by 20%, and place bottom left of tube.
Open el 76, reduce by 70%, and place on table.
Open el 71, reduce by 85%, and place on table.
Open el 40, reduce by 90%, and place on el 71.
Open el 73, reduce by 95%, place on bottom right, on grass.
Open el 16, reduce by 95%, place on bottom right, on grass.
Open el 31, reduce by 70%, place on bottom left, on the other chess piece.
Open el 69, reduce by 80%, place on floor, behind the tube.
Open el 9, reduce by 80%, place angled on top right corner.
Open el 51, reduce by 85%, place on right side.
Open el 23, reduce by 95%, place on bottom left, on red rose.
Open el 49, reduce by 80%, place on bottom left, on bottom of white chess piece.
Open el 75, reduce by 75%, place on front of table.
Open el 27, reduce by 70%, place on bottom of ball.
Lastly, add 3D drop shadows on whatever elements you would like them on. I like these settings: 2V 1H 70 op, 4B. Make sure at this point that you add copyright info for the tube artist..you can also add info for the scrap maker if the tube maker's TOU allows. Make sure you check TOU's!
You did it! You have completed this tut! Now you can add personalization to your creation! I hope you enjoyed this tutorial; if you did, please follow my blog, and pass it on to others! Also, please email your creations with my tuts or templates, and I will happily display them here on my blog (robynebutts@gmail.com)!
Hugz and Blessings,
Robyne'


Preview of the gorgeous Graduate tube by Trinita!

Preview of the beautiful Fleurs De Paris scrap kit by Kizzed By Kelz!

CT PTU Tut for the Graduate tube by Trinita, and the Fleurs De Paris scrap kit by Kizzed By Kelz!
Materials Needed
The Graduate tube by Trinita, which can be purchased at PFD HERE
The Fleurs De Paris kit by Kizzed By Kelz, which can be purchased at PFD HERE
Mask 84 by Wee Scotts Lass, which can be downloaded on her blog HERE
PSP - I am using X5, but any should do
***This tutorial assumes you have a working knowledge of PSP***
Okay, let's begin. The first thing you want to do is to create our mask. Open whatever mask you choose to use; I have chosen a mask by WSL. Okay, in Paint Shop Pro (PSP) click FILE>OPEN>and open the mask you have chosen, then start a new image FILE>NEW>700x700 and transparent needs to be checked. Flood fill the new image with the color black. Now go to the top layers menu and click NEW MASK LAYER> from image...a pop up opens..click on the title of the mask you chose in the drop down menu. Now go back to the side layers menu and click on the square that has the layers combined...right click it then click merge..the merge group..and voila..you have a mask layer now! :) Just copy and paste it to the tag, and center it. Duplicate it and place wherever you want to see mask.
***(NOTE: there is a layers menu on the right side of your screen..if u do not see it then look up top and click VIEW>PALETTES>LAYERS and it will open up...u use this layer to bring things to the front..say for example u put a shoe on the tag but it went behind a bucket and u want it in front of the bucket...while holding the left click button on your mouse or touch pad down, you would slide the shoe to the layer the bucket is on..it would now be in the front...use this anytime u want to bring something to the forefront.)***
Okay, let's get started! First find and open el 121, the frame, and copy it to the new tag...center it, and increase it by 65%. Next, find and open your Graduate tube with the following layers:the crown, hair 5, organza 2, dress 9, silver shoes, and silver bracelet...merge visible layers...copy and paste to tag and reduce by 45%, and place her on the left side of the frame. Now go back and copy and paste her to the frame..FH and reduce her by 15%, and place her centered on the frame...erase extra. Now find and open paper 13, and place it behind the frame.
Next, find and open the el 13, and reduce it by 80%, and place it on the bottom right, on the frame. Next, find and open the el 50, and reduce it by 70%, and place it on the right side, behind the case. Next, find and open the el 1, and reduce it by 70%, and place it on the right, behind the tower. Next, find and open the el 6, and reduce it by 90%, and place it angled on the right, in front of the tower.
Next, find and open the el 73, and reduce it by 60%, and place it on the bottom right, in front of the case. Next, find and open the el 115, and reduce it by 40%, and place it centered at the bottom, on the frame layer. Next, find and open the el 125, and reduce it by 70%, and place it centered on the bottom, on el 115. Next, find and open the el 108, and reduce it by 90%, and place center bottom, on el 125. Next, find and open el 122, and reduce it by 85%, and place it on the bottom right, on the corner of the case.
Next, find and open the el 118, and leaving the size as is, place it on the left side, on the mask. Next, find and open the el 57, and reduce it by 80%, and place on the bottom right of the case. Next, find and open the el 36, and reduce it by 80%, and place it on the top right corner of the frame. Next, find and open el 45, and reduce it by 85%, and place it on the top right, center of the bow. Next, find and open el 62, and reduce it by 95%, and place on the bottom, on the other flowers.
Next, find and open the el 24, and reduce it by 85%, and place it on the bottom right, in front of the case. Next, find and open the el 78, and reduce it by 90%, and place it on the right, on top of the case. Next, find and open the el 105, and reduce it by 90%, and place it bottom center, on the other flowers. Next, find and open el 66, and reduce it by 90%, and place it on the bottom right, by the candle. Next, find and open el 85, and reduce it by 95%, and place it on the top left corner of the frame. Next, find and open el 130, and leaving the size as is, place it on the left side of the mask...D, FH and place on the right side.
Lastly, add 3D drop shadows wherever you would like them to be....I like these settings: 2V 1H 70 op, 4B. Make sure at this point that you add the copyright information (VERY IMPORTANT)!!
You did it! You now have finished this tag. Finally, add a name in any font and color of your choosing. I hope you enjoyed this tutorial. If you did, please follow my blog and pass it along to others. If you make a tag using this tutorial, please send it to me at robynebutts@gmail.com, so I can place it on my blog.
Hugs and blessings,
Robyne
Subscribe to:
Posts
(Atom)
Licensed Reseller

Beautiful Blog Award

Designer That Inspires Award

Blog I Love Award

Rawk My Socks Award

CU License Tagging Obsessions
Niqui Designs CU License

CU License Scraps Dimensions
DzinesByMelz CU License

Anorie's CU License

CU License Lacarolita's Designz
CU License Tezza'a Dezignz

CU License Scrap and Tubes

Cakie Pot Pie CU License

Denise Creationz CU License
EW CU License

FDM CU License

More shops I CT for & Love


 "
"


